11/11/10

Tarnish Happens

The customer looks at me– wide eyed. "Will it tarnish?" "How should I polish it?" She looks almost frightened.

Those of us who work in silver have encountered this scenario many times. And I think we can understand our customer's fear– she has found a piece that she really loves, and doesn't want to have it change or need to labor over its care.

So what about that devil Tarnish? What is it, what causes it, can it be prevented? How about the question of polishing?

I decided to title this article Tarnish Happens because that was the first surprising thing I learned when doing my research. I work a great deal with Precious Metal Clay (PMC). PMC is fine silver, or 99.9% pure silver. There is a widespread belief that pure silver doesn't tarnish. The story goes like this: sterling silver is an alloy. It is 92.5% pure silver, and the remainder of the alloy contains some copper. Copper tarnishes easily; hence, sterling silver tarnishes because of the copper in it. Fine silver– on the other hand– being pure, contains no copper and therefore doesn't tarnish.

Ahh, but then I polled some of my fellow Etsy MetalClay Team members about their experiences with tarnish. Some were telling me they've had PMC pieces tarnish! What's up with that??? I was confused.

I learned that ALL silver tarnishes. When silver combines with sulfur, it forms something called silver sulfide. Silver sulfide is black. This oxidizing process is what we call tarnish. Yes, copper tarnishes more readily, causing sterling silver to tarnish more quickly. But depending on the circumstances, fine silver tarnishes only slightly less readily.

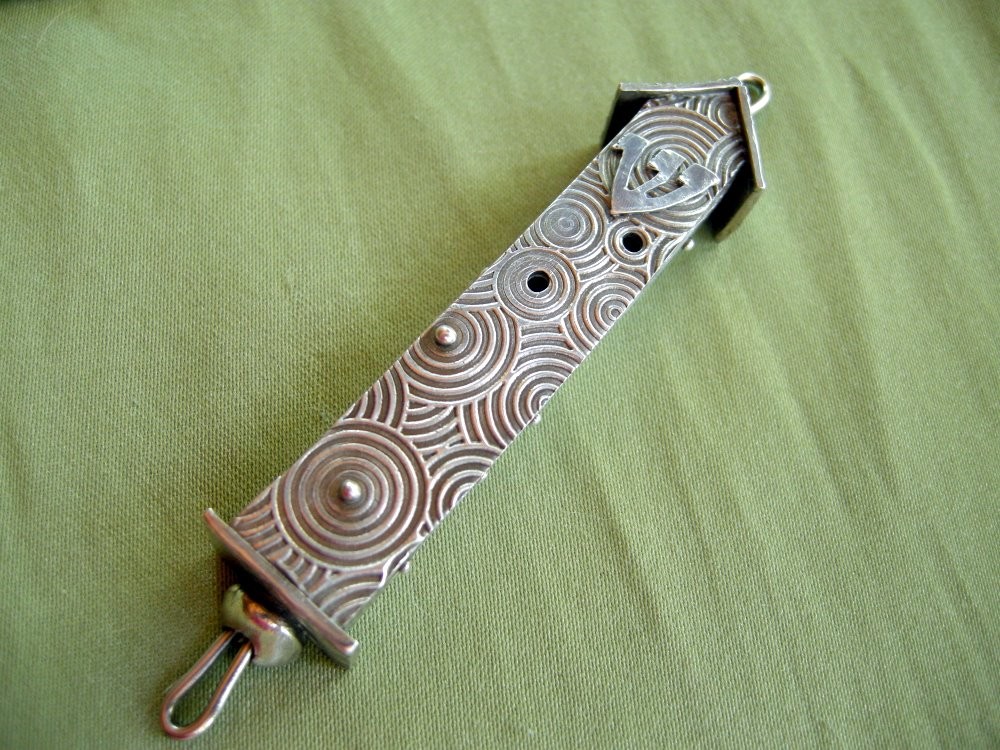
PMC pieces that have been sitting around for about 5 years. The chain is sterling shown as a comparison.


The circumstances I alluded to are the ingredients in the tarnish recipe. Turns out there are many, and they can be mixed in various proportions. You really only need one of these ingredients for tarnishing to happen. Here they are:

The environment Things in the water like chlorine and magnesium sulfates or like gases in the air (sulfur dioxide air pollution).

The climate Elevated temperatures, increased humidity and poor air circulation

Everyday products Cosmetics, hair sprays, household bleach, phosphate detergents, fossil fuels, latex (as in paints or latex gloves).

Crazy stuff Wool, rubber bands, eggs, onions, even certain people's own body chemistry... haven't we all encountered the customer who tells us she can't wear silver because it turns color on her immediately? Well, it's true!

So how can tarnish be prevented? There are some steps that can be taken. You can probably guess after having read some of the causes of tarnish that a good preventative measure is to keep your silver sealed in a plastic bag when not being used. This is one of the best measures to take. Another would be not to wear your silver jewelry when applying make-up, cleaning or gardening. Seems obvious but is not always done. A good rule of thumb is "last on, first off"; meaning put your jewelry on last– after make-up, hair spray, etc. and take it off first before doing things like dishwashing.

One of my EMC Teammates suggested being sure to store your silver away from gas appliances. This is not something most people would think of, but makes sense because sulfur is added to natural gas for its odor as a safety precaution. And we now know, sulfur is a big culprit in the tarnishing process.

Another handy suggestion is to save those little "anti-dessicant" packs we get in new purses or the box containing new shoes. Store them with your silver to help keep moisture away. Chalkboard chalk can do this, too. Or, if you really want to, commercial "tarnish tabs" (treated pieces of paper) can be stored with your jewelry. They are made by 3M.


Last we have the maintenance question. First, keep your jewelry clean. It can be washed occasionally, in soap (make sure it's phosphate-free) and water. Dry it well. Commercial polishing cloths are an excellent way to clean your silver jewelry. Some more aggressive methods of cleaning tarnish off would be to clean with a paste made of baking soda and water, or to use the silver cleaning method of simmering the piece in an aluminum pan filled with baking soda and water (instructions can be found on the internet). Use caution with these methods if your piece has an oxidized finish on it that was put there by the artist. You could potentially remove this effect. Chemical dips and liquid polishes are not recommended for jewelry for many reasons relating to their harshness.

I'd like to end by telling you how I feel about tarnish. I'm one of the above-mentioned artists who oxidizes many of my pieces. I happen to love the antique, time-worn mellow patina that silver can have. May I make the radical suggestion of learning to accept the tarnishing process as part of the beauty of owning silver? Store your jewelry in a plastic bag, take it out and love it and wear it! With minimal care it will be a thing of beauty for a long time.

I'd like to thank the following EMC Team members for their insight which contributed to this article: Zoe Nelson, Lorena Angulo, Janice Doner, Judy Gordon, Beverly Gallerani, Jennifer Smith-Righter, and Jane Font.

Also, I thank Tim McCreight for answering all my questions on this (much more complicated than I anticipated!) topic.

Article written by Evelyn

11/6/10

Etsy MetalClay Team Charity Charm Bracelet

The Etsy MetalClay Team did a charm exchange back in April of 2010. Each member made an extra charm so that a charm bracelet could be donated to charity. The EMC Team is currently auctioning off the above bracelet for the benefit of the organization of Autism Speaks.

Autism Speaks is a charity organization that was founded in February of 2005. This organization has become the nation's leader in raising funds for the scientific research in causes, treatment, prevention and ultimately a cure for autism. Autism Speaks strives to raise awareness of autism and advocating for the needs of individuals with autism and their families.

The charm bracelet is composed of a 7 inch sterling silver chain and 22 handmade charms composed of bronze, fine silver and copper. The charms range in size from a 1/2 inch to 1 inch in size. 100% of the proceeds from the ebay auction will be donated to Autism Speaks. The auction will end on November 14th at 6:00 pm PST. Thank you to the EMC team members who have donated charms and to those who have organized the charity auction. Please forward this information to as many as possible so that we can raise money and awareness for such a worthy cause.


6/3/10

Start with Why

Posted By Team Member Ruth from Birdland Creations


I was recently reading about and listening to Simon Sinek who is a Marketing Consultant.   He was talking about how to inspire people to buy your product.

I really liked what he had to say.  He has a short video that explains it all far better than I could, but what it boils down to is that he believes that :

"People don't buy what you do, they buy why you do it."

His website is then all about "start with the why" and the importance of that.  It made me think of why I work in metal clay and also how I can get this message across better on my website and stores.

I thought you might be interested to read it - and maybe also consider the importance of telling the "why" in your story.

Hope he inspires you!

5/11/10

The Little Blob Link Bracelet

A bunch of us on the team are taking part in a charm swap again. We had so much fun the first time that new members really wanted to do it too and some of us, me included, jumped at the chance to trade charms again.

The last time, our swap hostess Teresa Boland gathered enough charms so that we got to assemble two extra bracelets and they were donated to worthy causes. We are going to do that again this time because we really liked sharing our good fortune at receiving all these beautiful charms made by our enthusiastic members.

I made two fused and textured bracelets last time and one of them went with a set of the charms to our first chosen charity and the other one I kept for my own team charms.

I learned to fuse fine silver wire from Anne Mitchell and I've made plenty of fused chains in the last five years. Recently I began working on a new style of fused chain that was inspired by another etsy seller, Kathy Van Kleeck. She makes some wonderfully organic fused sterling silver chains to accompany her hand formed fine silver PMC links. While I don't know exactly how she makes her necklaces, I was excited to start experimenting in my own way to fuse some fine silver wire links into a handmade bracelet that could eventually hold my new set of charms. I also wanted to share this technique with my team members and our current charm swap hostess Kelly Fehr.

This is what I came up with (click on each photo for a bigger view):


And this is how I made it:

I found myself a wooden dowel that wasn't too big. For this small chain, I got one that runs about 5/16th inch.


That's 7.5 to 8 millimeters in diameter.


I also used:

20 gauge fine silver wire and I wrap it snuggly around the dowel


a commercially made sterling silver clasp
a 5 millimeter 18 gauge sterling silver jump ring to attach the clasp

cutting pliers
chain nose pliers
OR
needle nose pliers


a small hand held butane torch - I like this one in particular for the small gauge of wire I use in this project as other more heavy duty ones can be too hot.


Check it out here where there are some instructions for use.

a fire brick that you can get from any ceramics store, with some grooves scraped into it


a bowl of water for quenching the hot silver

a tumbler with stainless steel shot for smoothing and polishing your chain

Optional extras:

-your charms
-handmade PMC bead caps
-18 gauge 6 millimeter sterling silver jump rings - one for each charm
-liver of sulphur for patina
-fine silver wire in various gauges so you can make balled head pins to attach beads or charms
-silver polishing pads or cloth
-gems, pearls, beads

So, after you've wrapped the 20 gauge wire around the dowel, pull the coil off and cut the links apart. Make as many as you think you'll need. My bracelet has 28 links. You can also make extra links if you want to. You could make two bracelets and use one for charms and another for pearls and you'll get more practice.


next, you want to bend each link like this:


then cross those two ends to make a piece that looks like this:


Here is the tricky part where you will need some practice to get good. You could start with a thicker gauge of wire, like 18 or 16 gauge which can be much easier to fuse, especially if you are a beginner.

Anyway, let's say you have practiced.

I like to turn the light low, turn on the torch and have my link on the firebrick. I use a small quiet flame and slowly heat up the link:


It is going to start to get orange hot and I keep heating until it just begins to look a little shiny:


Now look at this next photo and how much brighter it looks at the join.


That is the optimum moment to point the flame at that spot and it will melt together very quickly. It's most important to remove the flame as soon as you see it melt together because a split second later the whole link can melt and split apart and roll into a ball and be lost forever.

I told you it was tricky!

After this step, it's okay to quench in a bowl of water.


This is what the first link looks like fused and this is when I would take my pair of chain nose pliers and squeeze my blob to make it look a bit less blobby and pointy and more even and smooth and also shape it the way I want it to look:


So now you want to add another link. Here is the set up:


Here is another shallower groove I can set a link this small into:


So remember:

Cut the links:


bend them and cross them:


fuse a few:


and here's a tip to make the process more efficient:

Always link two fused links with one that you are about to fuse instead of fusing one on each time. So when you have a length of chain made, use an open link to attach a new single fused link to the length of chain you already have and you will be adding two at a time.

Here is a relative size comparison:


So when it's done, add the clasp with the jump ring, shape each link, tumble for a couple of hours, give it a patina, polish off the high points so the details show and assemble it with all your charms or beads.

and here are some detail shots (click on each photo for a larger view):


and the oxidized and polished end result:


I know, I am a ham. Enjoy making some chain!

5/1/10

You never know who you will meet


Lis-el Crowley of Heart of the Fire was teaching a metal clay class in Mystic, CT, when she received a very interesting visitor. The visitor looked strangely familiar so when Li-sel asked him "do I know you, you look so familiar?" The visitor responded "I am Joe Pantoliano."

Yes, Joe Pantoliano the well know character actor who has been in such hits as The Matrix, The Sopranos, Memento, and The Goonies just to name a few. Lis-el was teaching at a bead retreat when Joe wandered into her classroom. Joe Pantoliano was at the same retreat center for a different retreat. Joe bought Lis-el Druzy Necklace and another one of her necklaces. He was also sweet enough to pose for a picture with Lis-el Druzy necklace on. Goes to show you that you never now who will meet on any given day. Thanks Lis-el for sharing your story!

Lis-el Druzy Necklace


4/23/10

The Art of the Craft Show Part 2


Karen West of Eggtooth Originals was kind enough to put together a guide on having great Craft Fair Experience. In the second part of her guide Karen goes over the art of the booth set up and selling insights. Thank you Karen for putting together all of these helpful tips.
Booth set-up

Booth spaces are typically 10’ x 10”, but be prepared to get an application that specifies 8’ x 8’, 6’ x 6’, 10’ x 15’…you get the picture. Every show is different. For outdoor shows, especially multi-day shows, your first concern should be protecting your product and being prepared for inclement weather. Most vendors go with a canopy-type set up for outdoors. There are “easy-up” style canopies (E-Z Up, and Canopy King for example) that work just like the name suggests. You will usually sacrifice sturdiness for a canopy that is easy to put up, but starting out with a less expensive canopy is a good way to go until you are sure you enjoy the vendor experience. If you decide you want to make outdoor events a regular part of your art business, invest in a canopy like those made by Flourish Trimline. If the show is indoors, you will want to pay special attention to lighting. Choices for booth design are endless in style and creativity. Tables (with adjustable legs!) are a common starting place for jewelers, but don’t limit yourself. Be creative and always design your booth with the customer in mind. A good way to start the process is to go to a show and tour different booths with your particular product in mind. See what works and what doesn’t.


How much product to bring

You really won’t figure this out until you get a couple of shows under your belt. Expected attendance will help you gauge how much to bring. (If the application does not tell you that, ask the promoter.) When displaying your art, you want each piece to be appreciated for its uniqueness and so, it’s not good to overwhelm your booth with product; but on the other hand, you don’t want customers to think it’s all been picked through and you are low on stock. Basically, you want your display space to be full but not crowded.

The day of the show

Start the day well-rested because doing a show is a lot of work! Plan ahead carefully so that you don’t have to stay up late the night before a show. If you don’t have a specified load-in time, arrive early to give yourself plenty of time to set-up. This is particularly important when the venue is open to “early bird” customers.

Running your booth


Should you bring help? It depends. It’s great if you can get someone to help you with load-in and getting your booth furnishings in place. After that, though, your “help” might get in the way unless they know your product really well and they know how to work with customers. That said shows are a lot of work – the days are often long, and if you are not generally an extrovert, you will be tired at the end of the day.

Make sure you leave space for processing sales, wrapping product and business logistics. Ideally, this is in the form of a separate table or stand that is hidden or does not distract from your booth presentation.

Sad, but true, theft does occur. You will need to guard against it and keep it in mind when you set up your booth. It is particularly true for small items like jewelry. Keep the most expensive items close to where you plan to stand, or better yet, in a display cabinet. A booth design that makes people come into your booth is better than a design where your product is set up along the perimeter of your booth space.

Selling your art, dealing with customers, dealing with difficult customers….these are all things that will come with time and experience. The important thing is to be genuine and honest and tell people what makes your art special. Share your excitement!

Credit cards

If you decide to make art and craft shows a regular part of your business you should seriously consider getting set up to take credit cards. One option is to set up a Merchant Account with your bank. Once approved, you will get instruction about how to process credit cards. It costs you money to accept them – not just in the fees associated with having a merchant account, but you will also pay a small fee (2% to 5%) for each transaction. Still, you will generally sell more if you accept credit cards. You can keep your fees down by politely asking your customer if they have a regular credit card vs. a card with mileage plus or other such bells and whistles.


Last word

Shows can be a lot of fun. They can be exciting and rewarding. They offer you an opportunity to meet other amazing artists, dedicated customers, and new friends. You learn a great deal about how your art comes across to others in ways that you can’t learn from running a website alone. Yes…there are going to be disappointing shows, especially during the current economic climate. But you just may discover that art and craft shows become an essential and enjoyable part of your business.

A few resources

Book: Art Festival Guide – The Artist’s Guide to Selling in Art Festivals by Maria Arango of 1000 Wooducts
This book walks you through all of the steps in wonderful detail from a very experienced vendor.

CD: Booth Design and Merchandising for Craft and Trade Shows by Bruce Baker

CD: Dynamic Sales and Customer Service Techniques by Bruce Baker

You will find yourself listening to these CDs over and over again!

The Art of the Craft Show


Karen West of Egg Tooth Originals has been kind enough to write a how to for finding and having a great craft show experience.

Ah….spring time. It’s been more than 3 months since the frenzy of the holiday season. You’re all rested, you’ve had time to make new designs, and now you want to get out there and show the world what you’ve created. Being a vendor at an art and craft show is a great way to get your product out in front of an audience, get to know who your target market really is, make new connections, and build your business. Here are a few tips to get you thinking about doing your first show.

How to find shows

The internet is a great tool for finding out what shows are out there. Of course, the most obvious way to find a show is to search on “art and craft shows in x location”, but there are other sources such as chamber of commerce web sites, local event calendars, or organization web sites. There are published guides to shows, such as
Craftmaster News that are available for purchase. You might find it worth the money to subscribe for a year just to get a good list of events. One of the best sources for show information, however, is other vendors. You’ll be surprised and how willing many people are to share information, recommendations, tips, etc. Don’t’ be shy about asking.

Application process

Ah, applications. They are all different. Some are brief, requiring only a short description of the product you intend to sell, a photo or two, and your contact information. Others require multiple steps such as a description of your creation process, a resume, or information about how your art-making process is earth-friendly. You usually do not have a lot of space on applications for written sections (and jurors don’t want to read a memoir), so practice making your narratives brief and to the point. Most applications ask for a photo of your booth set-up. If you have never done a show, you may find yourself setting up your booth in your back yard just to get a jury photo.

Read each application carefully and thoroughly before you begin to fill it out. If something is not clear, ask the promoter for direction. Don’t procrastinate in returning the application. Some promoters schedule a jury after the application period closes and others fill slots as applications come in. Even when there is a scheduled jury date, some promoters may use the postmark date as a means to choose between two equally perfect submittals, especially when they are looking to balance categories of art work. And don’t be surprised that application periods close several months before the event date. An April deadline for a November show is not unusual.

Photographing for applications

The images that you submit with your application must show your work clearly without distortion or distraction. Taking a photo for an application is different than taking a photo for your website. There is a lot of guidance available on-line; you may even want to hire a photographer to take your jury photos. Or better yet, take a class in digital photography so that you can become a master of your jury photos. Some applications are very specific on how images should be titled, sized, etc., so pay close attention to instructions in the application.


4/21/10

"A Little About Me…" Part Two

Etsy Metal Clay Team Artists Tell Us About Themselves
Part Two


Here is a continuation of yesterday's topic: Etsy Metal Clay Team members answer the question:

In what way does your metal clay work express something about you?

In their own voices, in alphabetical order, are their answers:

Jane Font - Daisy Jane Designs:

Abandoned and Haunted House


I daydream a lot: things I’ve seen, weather I like, places I’d like to go, and past times I wish I could have experienced. Much of this goes into my work. I try to create places I can escape to just by looking at my jewelry. Sometimes I pick the piece I'm going to wear for the day based on my mood and where I wish I was. My little abandoned house necklace is my current favorite place to escape.


Molli Koltun - Modern Metal Jewelry:

Silver Crater Bracelet


My metal clay work is a creative expression of who I am, along with my longtime love of jewelry. The process involves small, methodical steps which reflects my attention and love of detail. It may also include problem solving and research which is a part of the creative process that I also enjoy. My pieces may look simple at first glance, but there is more to them in design and technique, even if it appears subtle.

My style is very much like my home - contemporary, a clean look with organic touches. A little more edge than meets the eye, both for my home and for myself. Besides I just love making jewelry!

Lori Magno - Moda di Magno

Rustic Rounds Earrings


Metal Clay is an extension of my Wabi Sabi life. Trying to appreciate everything, flaws and all - and especially the 'flaws' - that are likely intentional. I love that metal clay allows you to see the hand of the maker. That is my greatest joy with metal clay.


Rachel Miller - Rachels Things:

optic tower mezuzah


For years I have experimented with different mediums in an attempt to find a real reason to create something from my heart. I love to sketch, I’ve painted, collaged, done needlework, but I always struggled with what exactly to make, and what I wanted to express.

I think that the permanence of solid metal that silver clay becomes makes my pieces more valid. My faith has always been a personal importance to me, so I started making Jewish religious symbols. For me, they are contemporary interpretations of ancient symbols, which are still grounded in my love of antiquity. Metal clay has been a medium in which I’ve created things which I can be completely proud of…. And that has been a great gift to me.

Jennifer Smith-Righter - Wearable By Design

Arts and Crafts Style Necklace


I like things to be precise and in control, most of the time… and then I like things to be just how they are naturally. I think my work reflects both of those desires.


Sue Urquhart - Lulu Bug Jewelry:

Shar Pei


I'm quite the animal lover, and have been my whole life. I think this really shows in my metal clay work!


Catherine Witherell - Happy Day Art:

Tudor Rose Earrings


I used to be a shy person and never gave of my opinions, really I was pretty quiet and just went along with the flow. I liked beading and I would make earrings for my friends for birthdays and Christmas. Then I went off to an art retreat when my kids were 8 and 9 years old and got very inspired and excited by it. I kept going every year and learned so much while I gained a lot of confidence in my abilities. Around that same time I began working with PMC and I lost interest in the metal offerings at my local bead store. I had images in my head that were evolving influenced by the experiences I got at the retreat where I was exposed to mixed media collage techniques and so I adapted them to my PMC work. Now I spend days making drawings that I then figure out how to construct in metal clay. I like to complicate my designs. I like a lot going on... and movement.

Lisa Woinarski - Lillipilli Designs:

Tribal batik earrings


My favourite pieces are my batik inspired pieces. This is because they have a lot of meaning for me. I studied at Bahasa Indonesia in Yogyakarta, Central Java for a year as part of my degree. Yogyakarta is the cultural heart of Java. While there, I visited the Kraton (the sultan's palace) and came across a man, Pak Budi, who was making traditional hand-drawn batik. I asked if he could teach me, and soon I was visiting his home a few days a week to study with him. I loved those hours of intense concentration, peppered with small talk about differences between life in Indonesia and Australia while we both worked. He had a great sense of humour and we had many laughs, and my Indonesian improved immensely.

Now I live in San Diego, a long way from Indonesia. My batik inspired pieces represent that part of my life and keep me connected to Indonesia.


I have thoroughly enjoyed getting to know my teammates better. I hope hearing from them gives you more insight into these talented artists!

~ Evelyn P. Dombkowski - La Bella Luna Jewelry

4/20/10

"A Little About Me…"

Etsy Metal Clay Team Artists Tell Us About Themselves
Part One


If you're like me, when you see art that you love, you also wonder about the artist. How does this work reflect the artist's personality?

Members of the Etsy Metal Clay Team create works of art as rich, unique and beautiful as the artists themselves. So, I posed this question to them:

In what way does your metal clay work express something about you?

I asked them to make their answers as long or short as they'd like, even if it's only one word. The answers I received are both thoughtful and insightful.

Here, in their own voices, are their replies (in alphabetical order):

Lorena Angulo - Pueblo Folk Art:

PURE HEART


This questions is great!!! I think that my work is 100% me. I did not planned my work to be like this, it was a natural process.
I started drawing a lot and when I saw my drawings I notice that they all represent me, my culture, my traditions. I follow what my heart wants to express and I love to share with my work a little about me.


Ruth Baillie - Birdland Creations:

Anyone can do tricks


I feel my metal clay work shows my love of games, surprises and humor! I also trained as a psychologist and think my work shows that side in that my goal for each piece is that it evokes a positive emotion in the wearer or viewer. So instead of therapy, just wear jewelry!!!


Hug


For me, metal clay is enlightening... Through sculpting and molding, to create a tangible design, I am reminded of the connection between the design of art and the design of one's life. We too can be molded and shaped. The outcome of both is often a mystery.


Carrie Benvenuti - Uranium Cafe:

Dichroic Glass and Silver pendant


I have a variety of interests, and I think this transcends into my work. Not being partial to any one style, my work is eclectic.


Kristi Bowman - Dreamsome:

Disjointed Leaf


Since discovering Metal Clay I've been able to express my creativity in a way I've never done before. I work in a very non-creative job and have for many years. I've done creative things here and there over the years but nothing has unleashed my creativity as Metal Clay has done. I look at the world in a slightly different way, I really pay more attention to the look, feel and texture of everything around me in a very intense way now. I LOVE IT!

Nicola Callow - Murano Silver:

Incantation


My Artistic vision tends towards rich contrasts of colour and texture, so the Art and talismans of Ancient cultures, provide a continuing source of inspiration!
The Aztecs, Egyptians and early tribes left behind such a treasure trove of personal adornments. They spark our curiosity, awakening our inner story tellers, who imagine the lives that these artifacts have touched.
Mixed media work allows me to take “jewellery journeys” filled with discovery, and let pieces evolve their own stories. Polymer clay, traditional goldsmithing, enamelling, epoxy resins, alternative metals or reclaimed ephemera ~ whatever works!
It's both moving and humbling when I see someone connect with my work... knowing that once it's with them it will acquire their stories too, perhaps one day being passed on with special memories of that person.
Isn't it wonderful that as jewellery designers we might one day leave that kind of legacy?

Lis-el Crowley - Heart of the Fire:

New Moon


My approach to creativity is open and intuitive. I prefer to begin to work with my materials and let them reveal to me what they wish to become. I love to explore the variety of media I use in this way and hope that the end result is pleasing to view, touch and wear. I believe that handmade items carry a bit of the soul of the artisan and always strive to pour positive healing energy into everything I create.


Tomorrow: Part Two– More from the Etsy Metal Clay Team

~ Evelyn P. Dombkowski - La Bella Luna Jewelry

Related Posts Plugin for WordPress, Blogger...